Walls Property Settings in Floor Maps Building
Wall Properties for WiFi AP Deployment
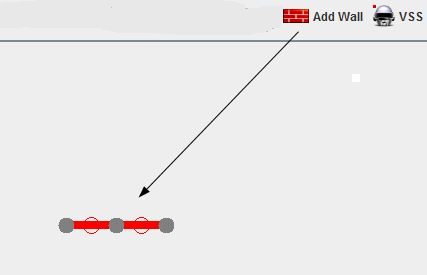
Some of the walls are highlighted in gray. By right clicking on a wall, it will be shown in bold, with end and midpoint selection dongles. Right clicking will show its characteristics and give you the opportunity to change or delete them if desired. You can move the walls by clicking and dragging with the left mouse button. Add a new wall by clicking and dragging the Add Wall icon down from the Menu Bar. Walls can be subdivided and “bent” by moving the open circle dongles.


There are a number of ways to manipulate a wall, as shown by the tool-tip when you hover your mouse over a wall. For example, with SHIFT-key pressed down, dragging at a handle will grow a new section of wall from the handle. You can also delete a section of a wall by selecting the section with ALT-KEY down and press Delete key or the Delete item on the wall specific pop-up.
In case you want to undo a wall operation, simply use CTRL-z to undo it, and CTRL-y will redo the change.
You can select multiple walls by clicking walls with Ctrl-key pressed down. Then you move, delete or set their properties as a group. This is the so-called group mode for walls.
You can select all the walls to apply the changes at once by selecting All Walls under the system pop-up.
You can copy a selected wall or a group of selected walls with CTRL-C or the Copy on the wall specific pop-up, move your mouse to a point, then make a paste with CTRL-V or the Paste Wall Here on the system pop-up.
Since placing walls on a floor plan take significant effort in making a deployment plan, make sure you are familiar with all the means to operate on walls, which can significantly reduce your time to generate a plan.


Leave a Reply
Want to join the discussion?Feel free to contribute!